Creative Reuse

Window Reuse Ideas

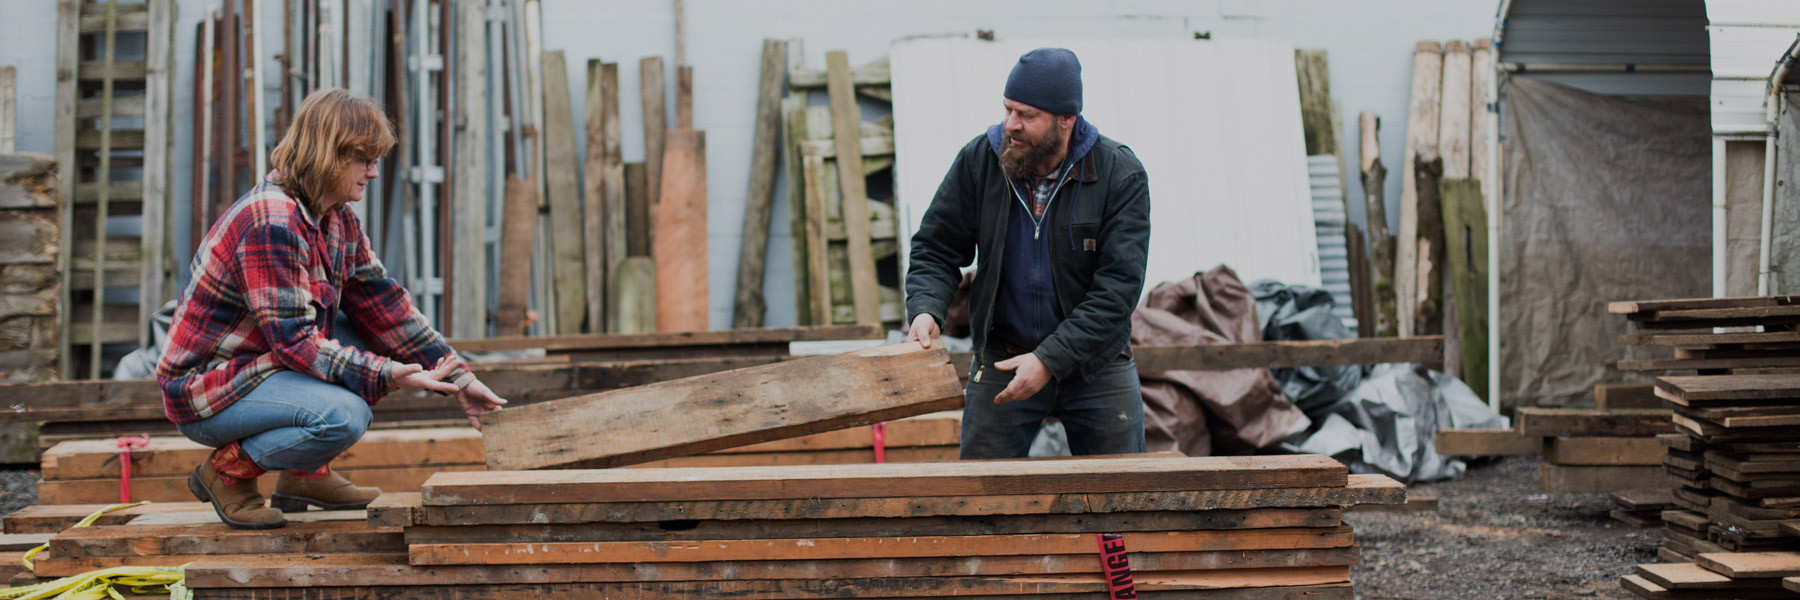
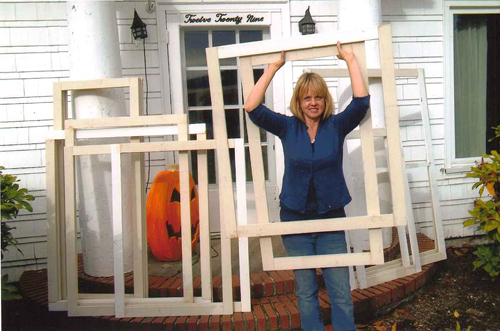
We have all seen old windows up for grabs on our neighborhood forums and in the aisles of The Rebuilding Center. Once you’ve snagged these single pane lead-filled beauties, what next? Here are some ideas of how you can reimagine old or unneeded windows. 

Coat Rack

Supplies Needed

  • Window
  • Knobs or hooks
  • 1"x4” piece of lumber
  • Screws to fasten it all together
  • Your favorite images

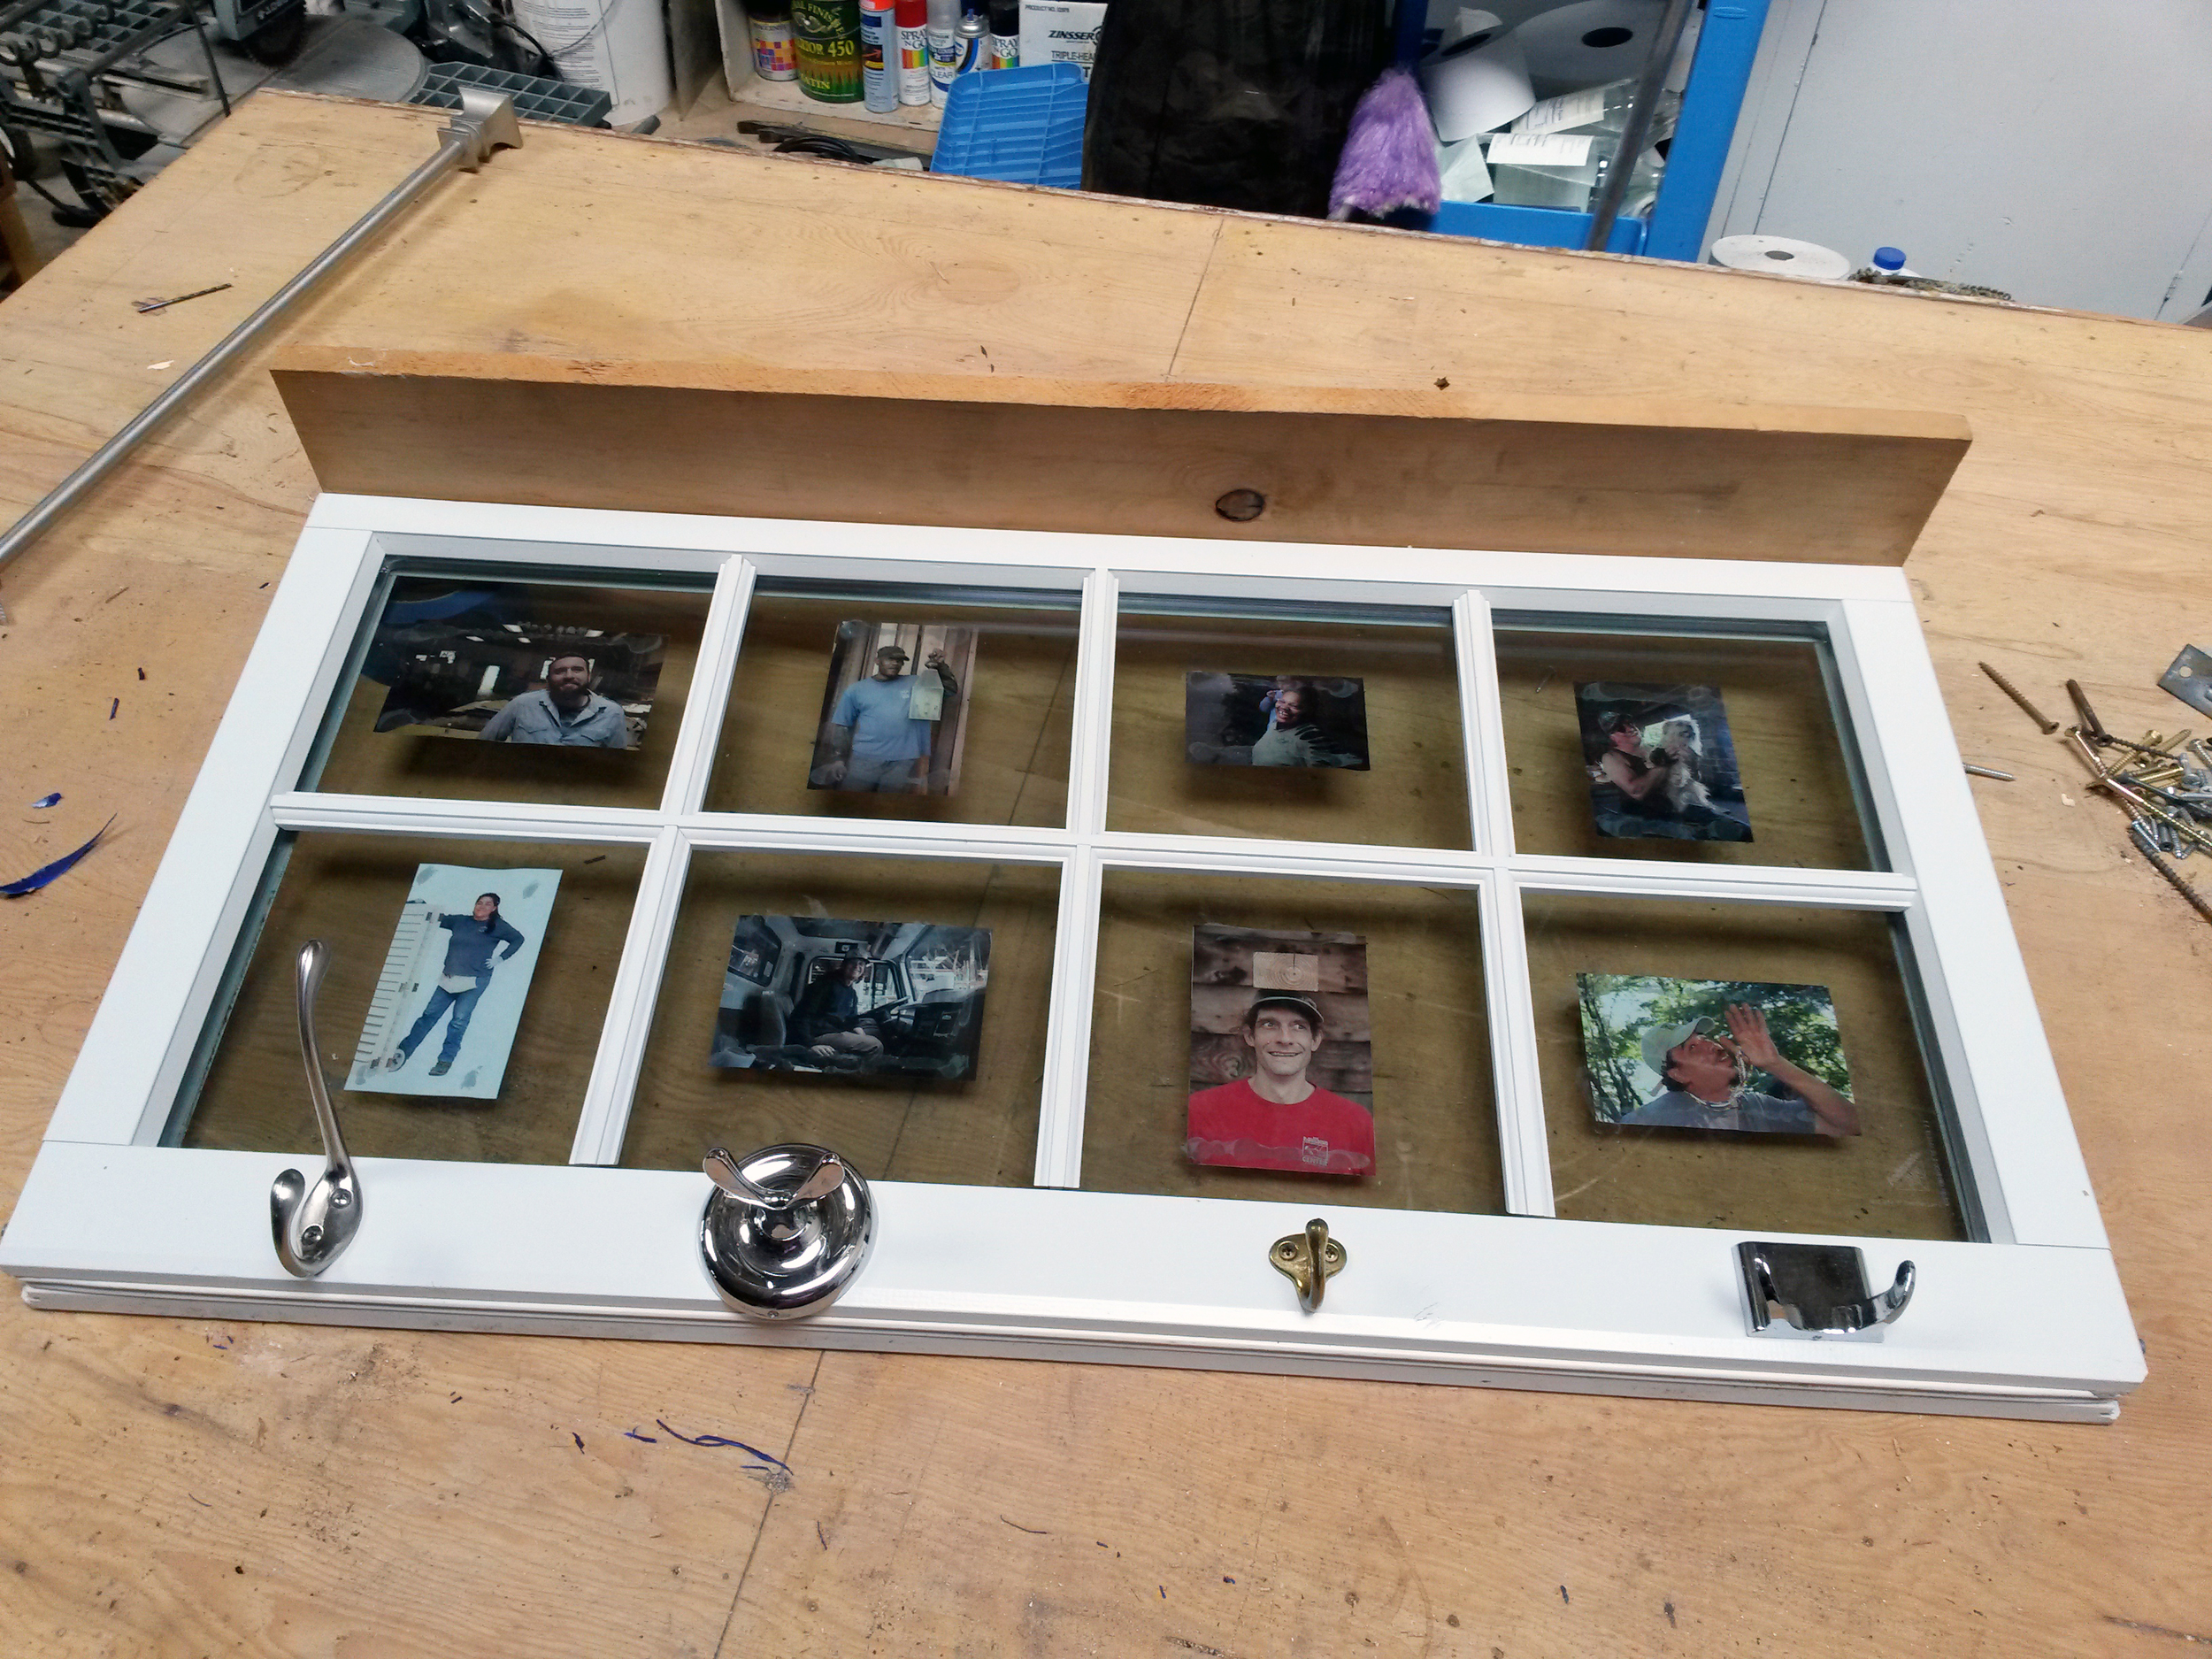
Cut your piece of lumber to size and fasten to the top of your window frame. This will be a shelf for your coat rack. Find your favorite knobs and hook and attach them to the front bottom of your window frame.  Glue or tape your favorite images of your friends and family to the back of the window facing forward.  That is all that this quick DIY project takes. You can always finish the shelf with paint to match your window frame. With the exception of your favorite images, all the items can be found at the Rebuilding Center. 

NOTE: To avoid splitting of the wood, pre-drill smaller holes in your frame before fastening screws. 

Chalkboard

Supplies Needed

  • Window 
  • Knobs or hooks
  • Chalkboard Paint
  • Screws to fasten your hardware


This is another simple DIY project. Paint the glass pane with your favorite colored chalkboard paint. Fasten your favorite hardware, keep in mind your needs based on where you will place your chalkboard. If you will have it in your kitchen, it could be cute to hang tea towels or your favorite coffee mug. If you want to hang it in your office or kid's room think about the hardware you will need for your use. Some alternatives to using chalkboard paint are dry erase board paint or magnetic paint. Once the paint is dry, you are ready to go!

Planter

Supplies Needed

  • Window frame
  • 1"x6” piece of lumber
  • Hook screw
  • Chain
  • Screws to fasten your lumber
  • Potted plant

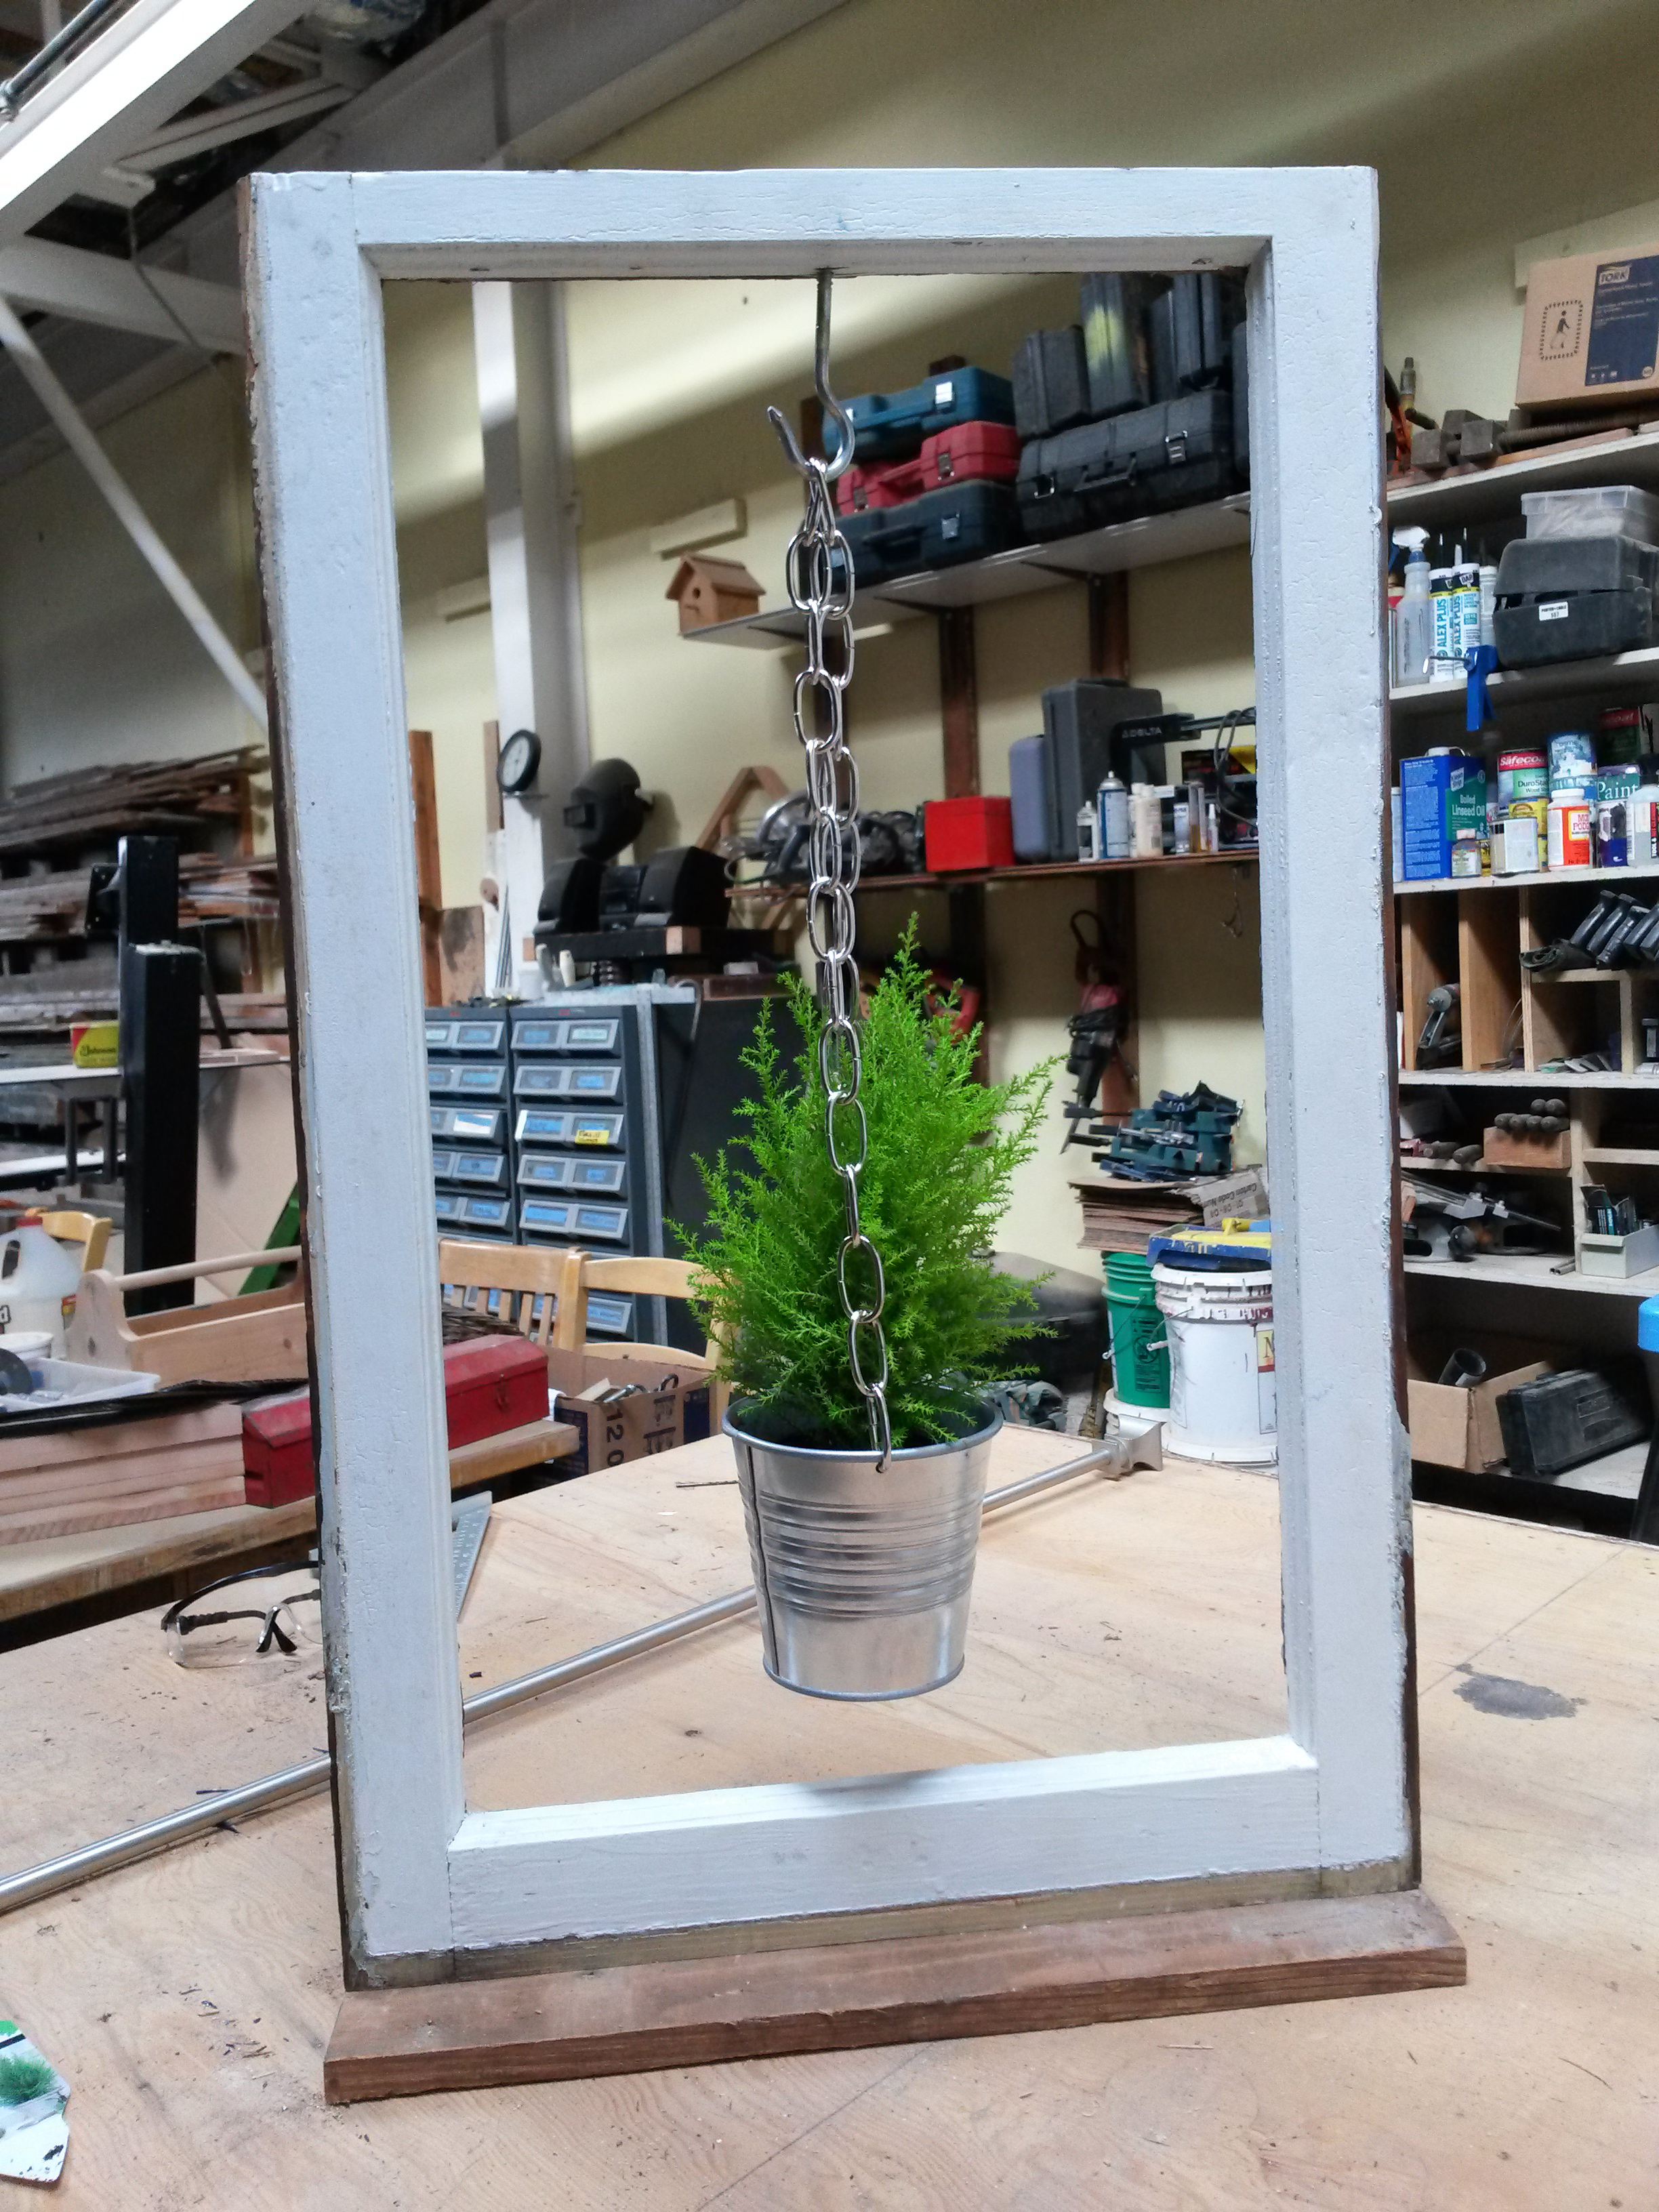
This DIY project is great for an empty window frame or broken window reuse. Carefully remove the glass from your frame. Cut the lumber to the length of your window frame. Ensure that the 1"x6” is wide enough to provide stability to your frame. You can use wider or narrower wood depending on the height of your frame. Fasten the lumber to your frame with screws. Pre-drill a smaller hole and screw your hook in the top of the inside of the frame. Before you add your plant to your pot, drill holes for the chain. We used a metal pot; you may have different requirements depending on the type of pot you use. Ensure that the chain is the right length based on where you want the pot to hang. Connect the pot to the chain, add your favorite plant and hang the chain on the hook. 
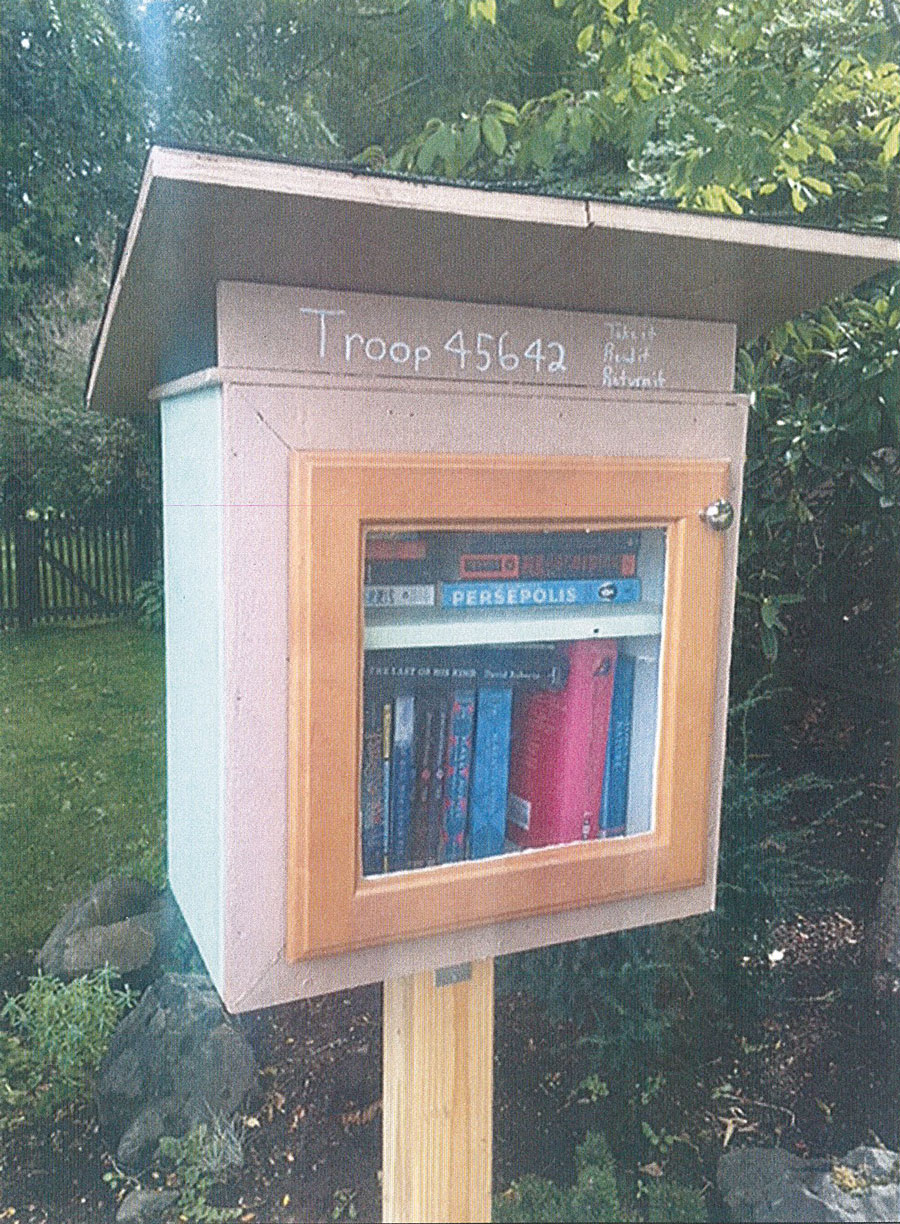
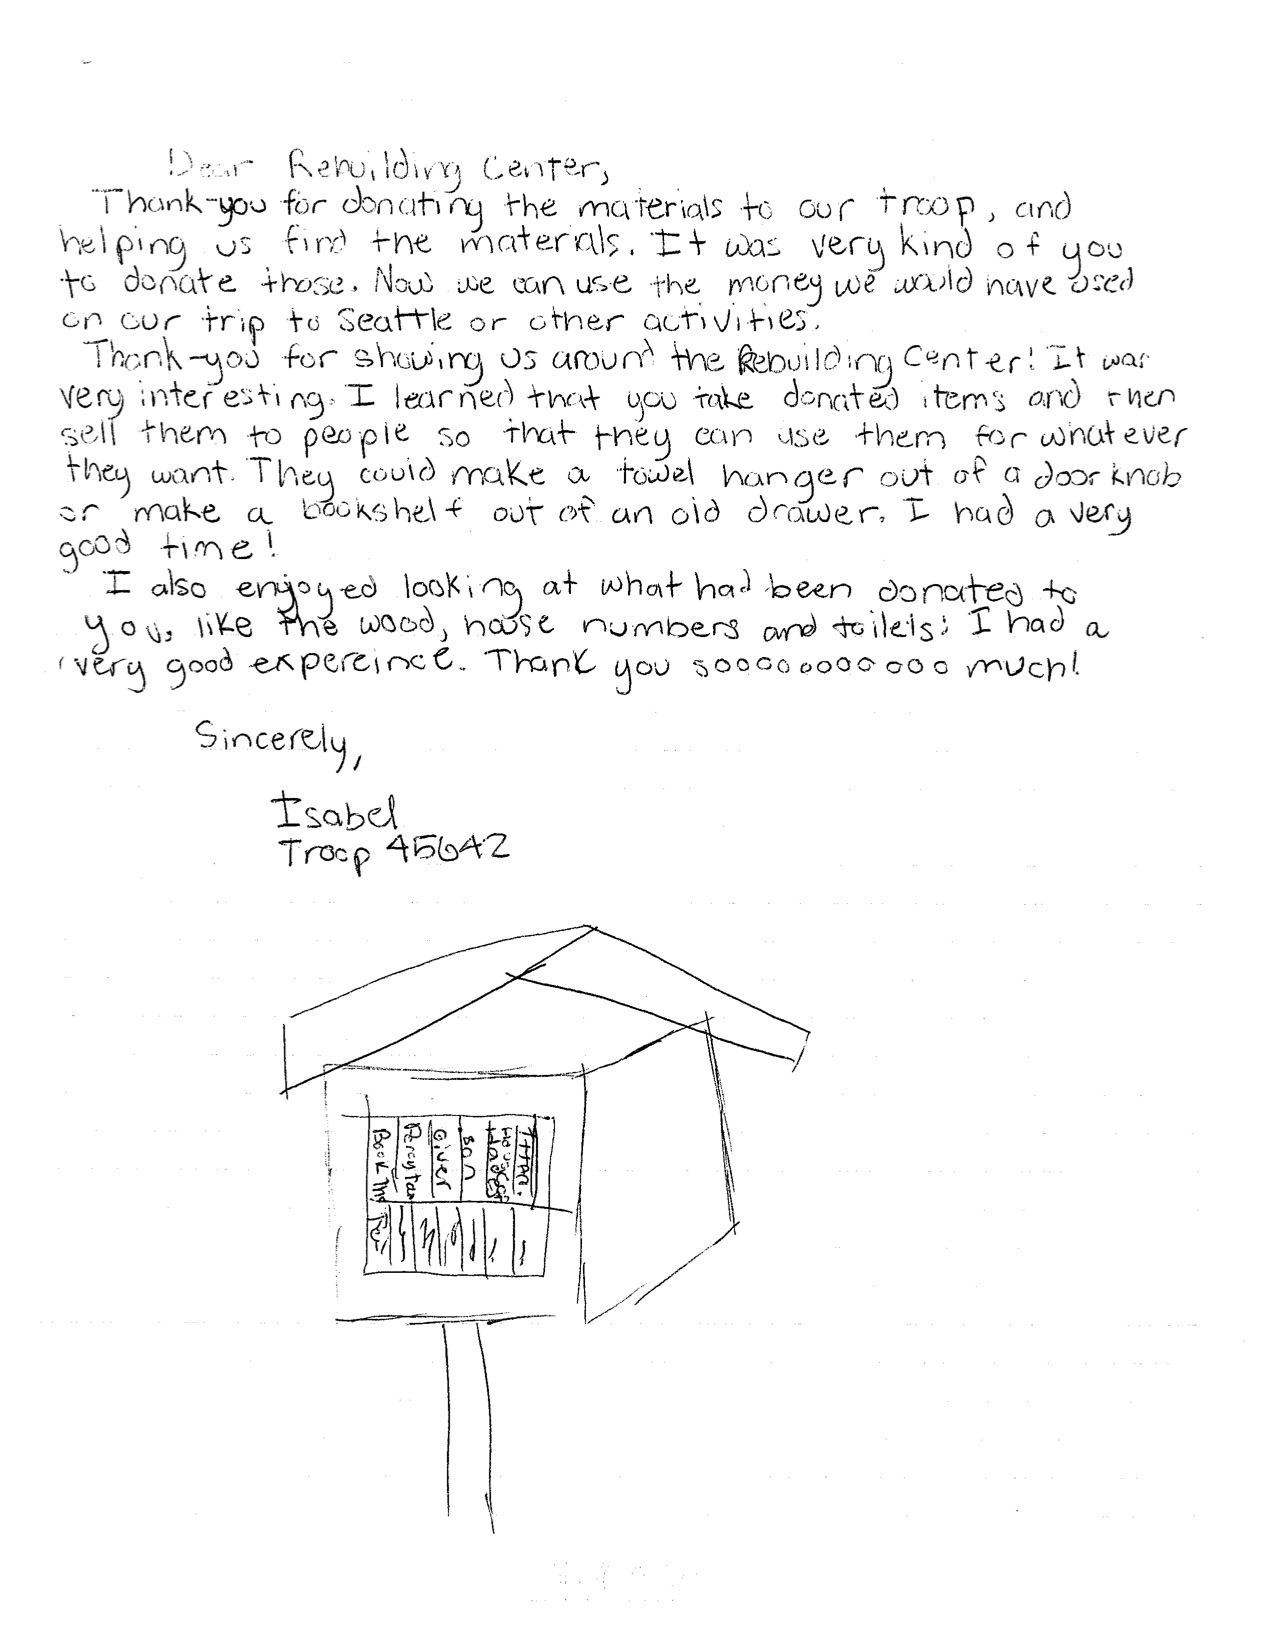
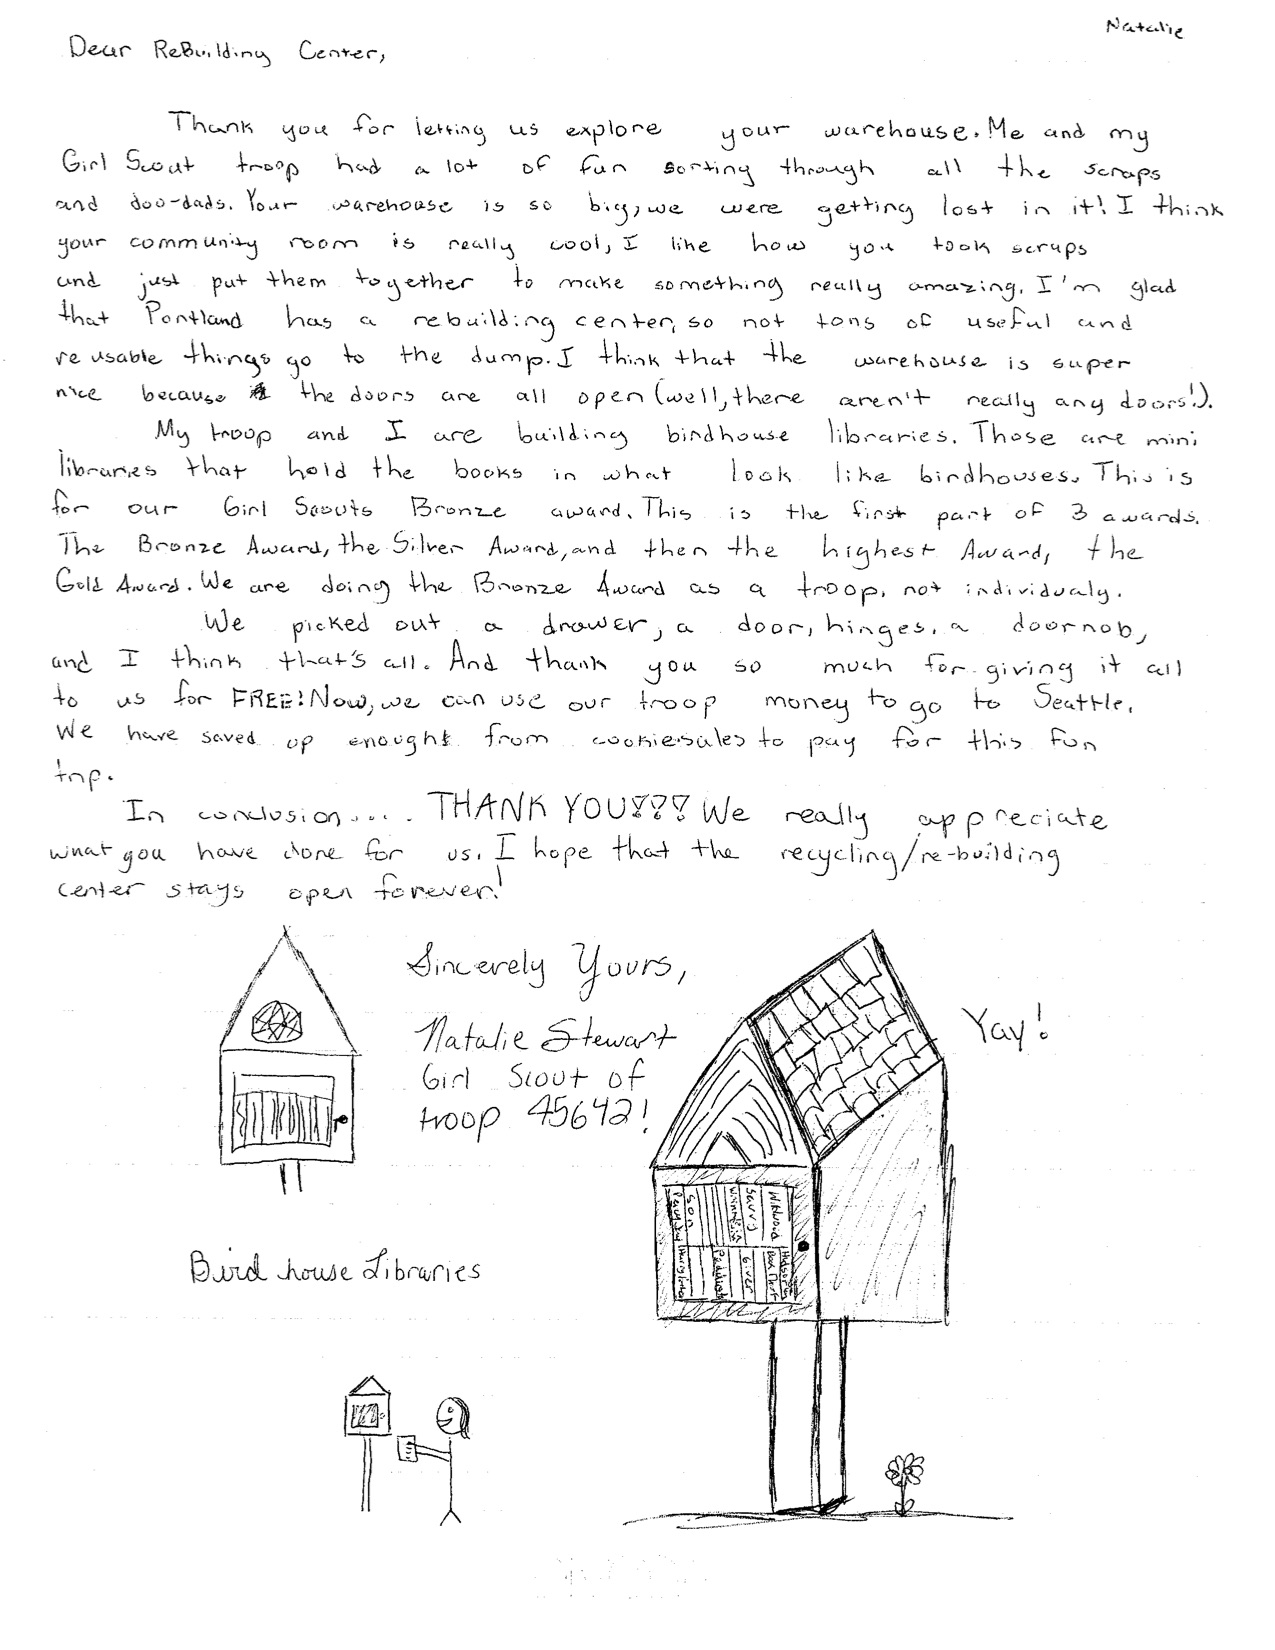
Cabinet

Supplies Needed

  • Lumber 
  • Screws
  • Hinges
  • Knob

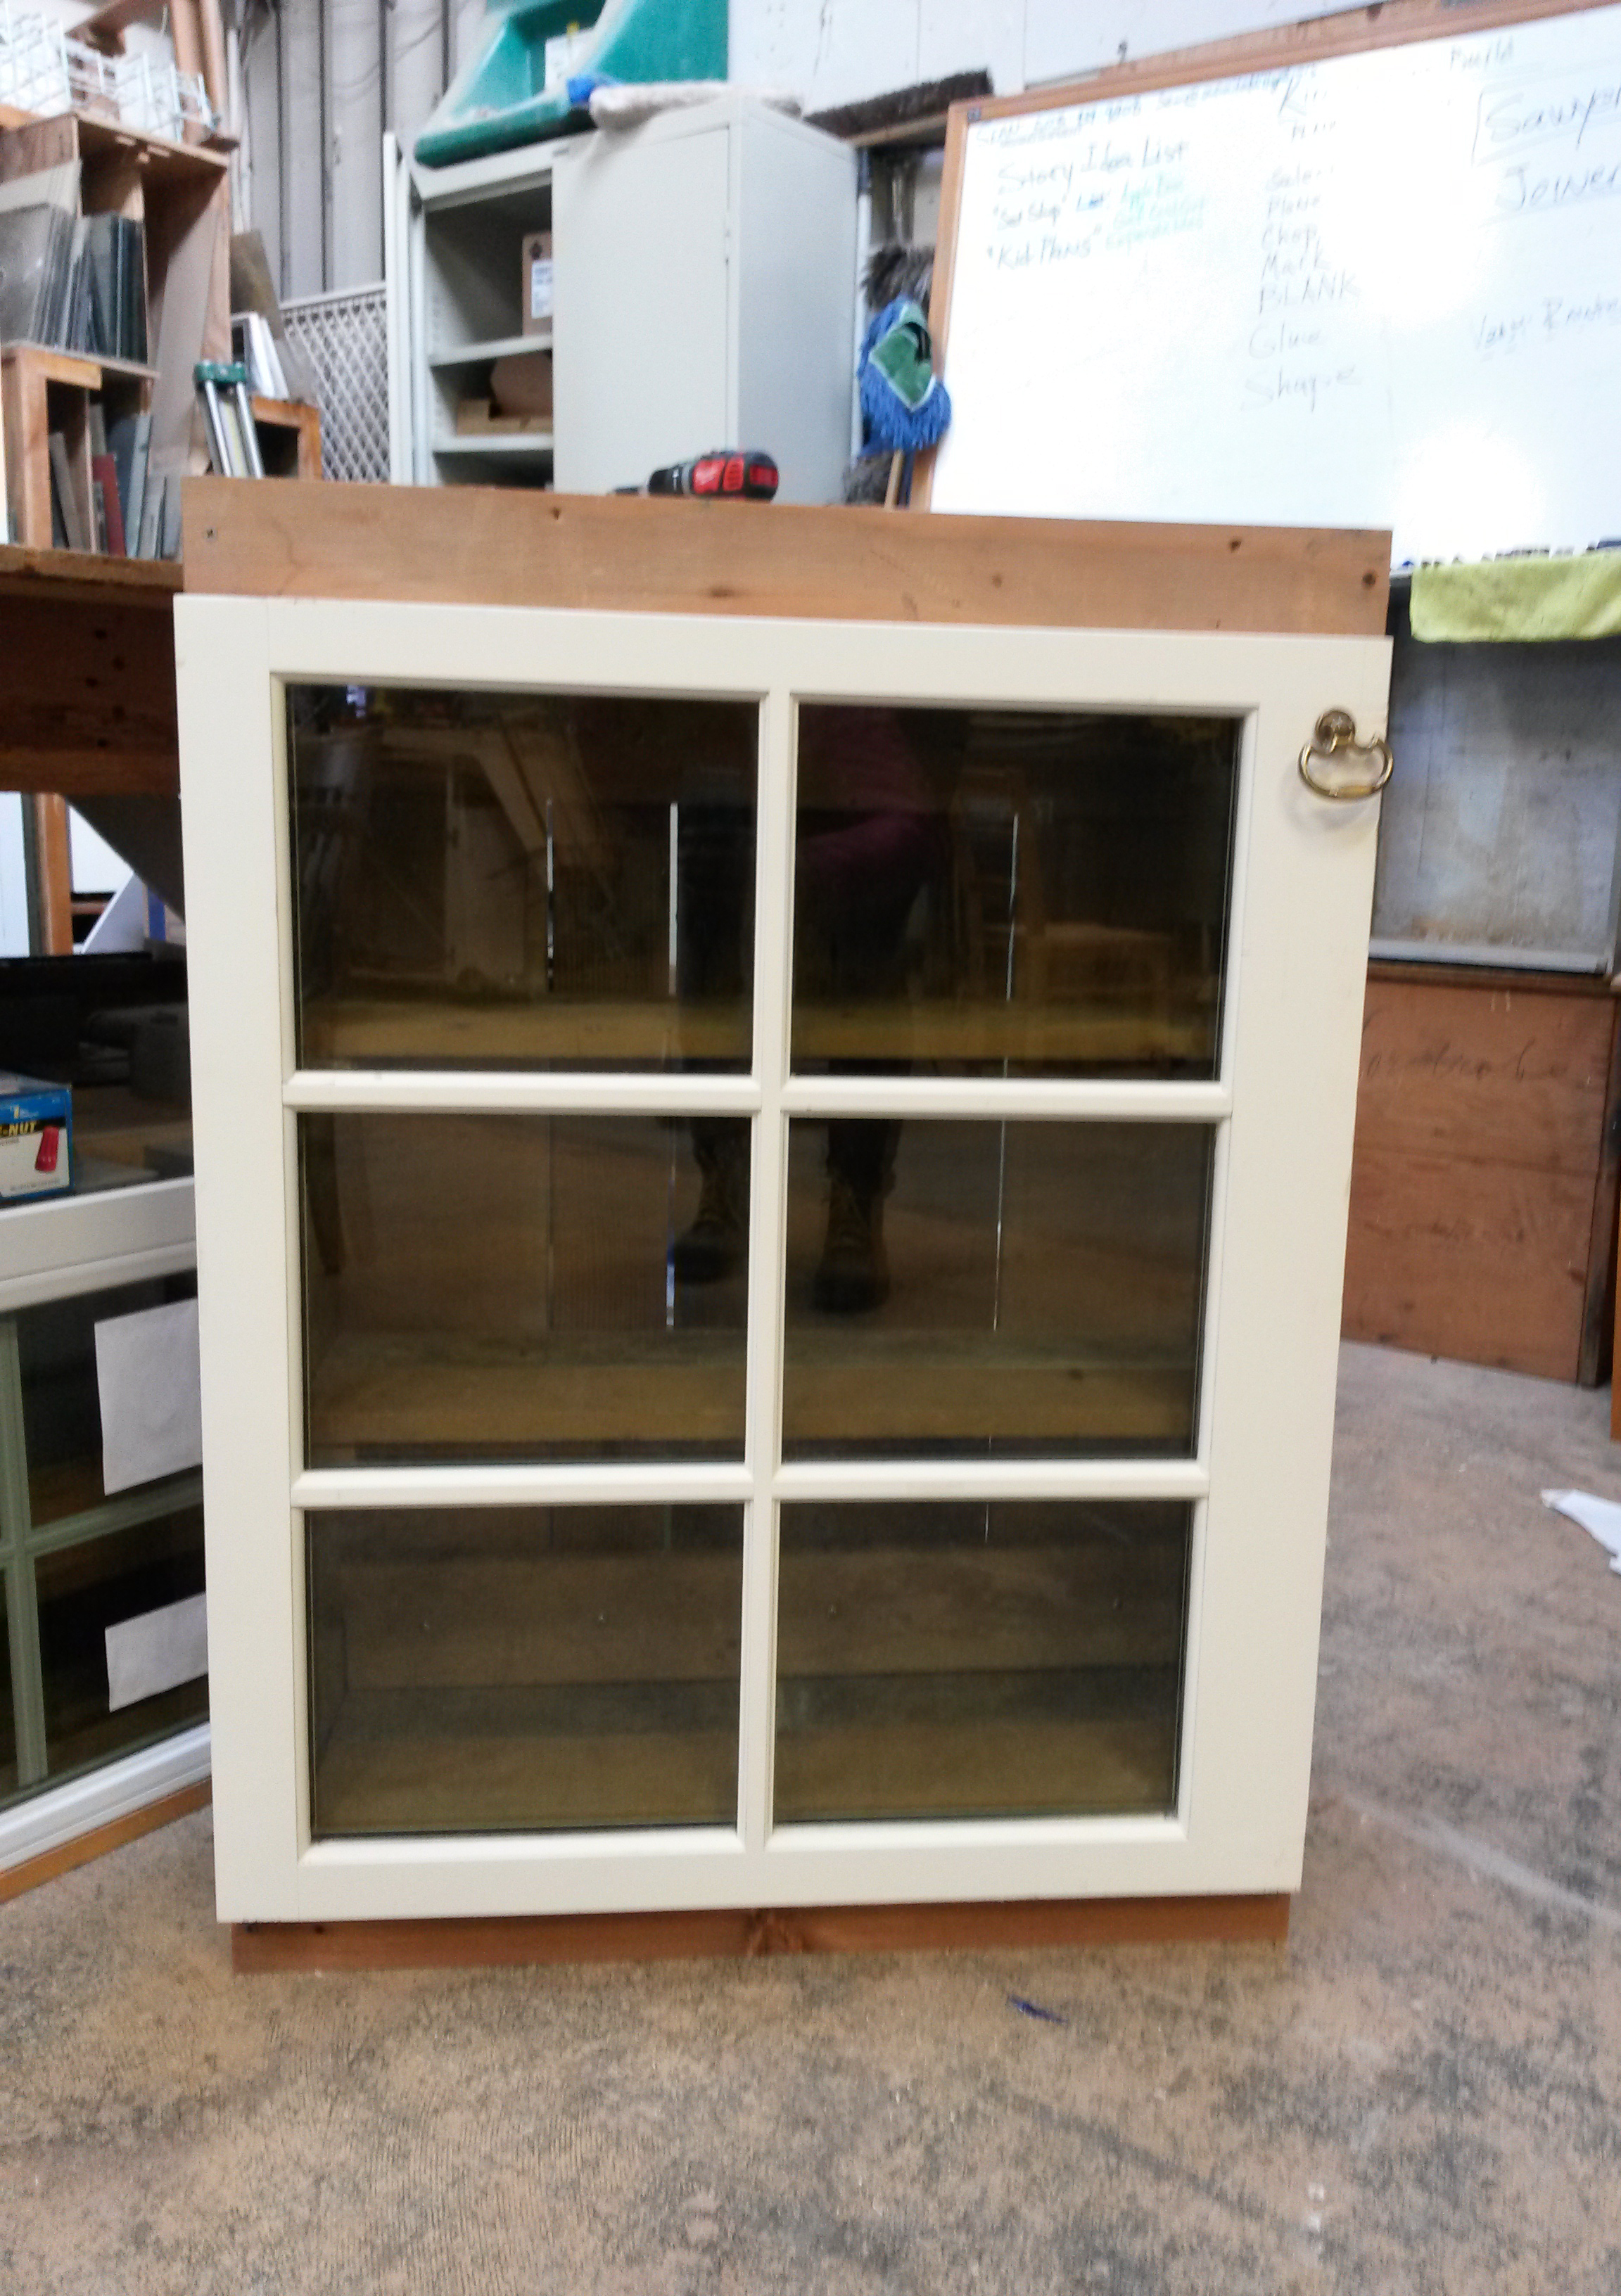
This DIY project requires more cutting and fastening than the above projects and could be a nice day project. The dimensions of your cabinet will depend on the size of your window. For this one I used 1"x2", 1"x6", and 1"x8" pieces of lumber for the sides and the back. I also used two rows of 1"x2" for the shelves. Your window will be the door. I measured the length of my window and added an additional 5". I added 2" to the bottom so the door doesn’t drag on the ground and I added 3" to the top so I can have an exterior shelf. Fasten three sides of your cabinet together using a 1"x2" strip for the rear and 2"x2" for the sides which also doubled as what will hold my shelving in place. So ensure the placement of the 2"x2"s on the sides match. Also make sure all the lumber is even height to avoid any teetering that might occur. Next cut the shelving and place it on the 2"x2" strips. You can fasten it in place but there is really no need. I found it easiest to place the cabinet on its back to install the door (window). Placing your hinges strait and at the same depth is important for the door to swing open with ease. Add your hardware and you are ready to go!

NOTE: The window I used was very heavy so when the cabinet was open it would tilt forward. This standing cabinet will have to be mounted to the wall to use.  

Salvage Works Reuses Vintage Lumber from Deconstructed Buildings to Make Beautiful Furniture

- by Whitney Laucks

Salvage Works is owned and operated by brother and sister team Preston and Rachel Browning.  They opened their doors in 2010, and in 2015 were able to upgrade to a 25,000 square foot facility in the historic Kenton neighborhood.  Inspired by their mother, who was an architect that practiced green building techniques even before such customs had been given a name, these siblings decided to follow in her footsteps and reuse local, vintage lumber and turnit into something new and beautiful.  

All lumber that Salvage Works uses is reclaimed from deconstructed barns and houses.  Even though these historic monuments may be falling apart as is, by recycling their invaluable material the Prestons are able to keep Oregon history alive. This is wood that is simply unavailable otherwise, and this crew knows the story behind every incredible piece of furniture that they create.  For instance the beautiful bar from Swift and Union seen in the picture below was made out of the lumber from this barn in Canby originally constructed in the 1920’s. 

Everything is made by hand with skilled craftsmanship and a great of team people who committed, not only to reuse, but to the preservation of Oregon History.  Every Third Thursday of the month Salvage Works hosts a celebration of this kind of carpentry and sculptural work, usually accompanied by live local music and libations.

2024 N ARGYLE ST
PORTLAND, OR 97217
INFO@SALVAGEWORKSPDX.COM
503-899-0052
MON-SAT 9-6, SUN 11-4
MONTHLY THIRD THURSDAY ART CELEBRATION COMMENCES AT 6PM

Camp SCRAP informs children about Creative Reuse

At Camp SCRAP kids from first through sixth grade are given the opportunity to explore the vast opportunities of creative reuse. Each day participants are educated about the fun and inventive ways recycled materials can be used in new and interesting ways.  For instance, one child took an old CD case and turned it into a bird feeder.  There are portions of the day dedicated to scheduled activities lead by staff members. There is also always allotted time for free building to allow the campers to let their individual creativity run loose with access to a craft supply wall that has loads of materials to reuse. Areas that are predominately showcased are Collage/Assemblage, Sculpture, Drawing/Painting, and Sewing.

SCRAP also offers many other educational creative reuse opportunities. Preschoolers to College students can schedule field trips to SCRAP for a unique and hands on experience with reducing excess by reusing materials.  Students will take away an informed vocabulary of this concept as well a true understanding of how important these practices are and how fun and creative this process can be.  These trips are easily customizable based on age group, number of kids, special needs or any other additional requirements. If a field trip is not possible to organize SCRAP will happily visit classrooms to give a one hour tutorial on the amazing benefits of reusability.

Every year SCRAP partners up with one local school that is lacking in art funding to donate reused material and crafts.  They also offer education and insight on projects and activities.  In turn each year’s highlighted school documents their artistic endeavors to further inspire education in the arts and in creative reuse.  Previous schools that have been involved in this program include Rigler Elementary, Whitman Elementary and The Ivy School.

In 1998 a group of teachers were desperate to find a way to avoid throwing away leftover classroom materials each year and decided to incept SCRAP. They originally brought these items to a Portland Public School’s resource space, A Teacher’s Space, for other teachers and administrators to use.  This didn’t prove to be impactful enough, so in 1999 Joan Grimm and group of her peers applied for and received a grant from the Department of Environmental Quality to open a resuse center for the whole community.  We, the ReBuilding Center, were the first to donate a space for them to operate in.  In 2013 SCRAP PDX redirected over 140 tons of usable material from the waste stream.  In other words, SCRAP not only rules, but they are the arts and crafts equivalent to ReBuilding Center!

For more information or to sign up for Camp SCRAP or to learn more about SCRAP’s vision and educational opportunities please visit srcappdx.org

Girl Scout's Little Libraries

A major part of what keeps ReBuilding Center up and running are volunteers and the community itself. The girls of the Scout Troop 45642 came to us looking to achieve the highest honor a junior girl scout can achieve and ventured to find what they could do for their community.

The troops collaborated on ideas and decided to build two little libraries. They knew they wanted to use reclaimed and salvaged materials so they came to us! The girls were eager to find all the different parts they needed to build their birdhouse-looking libraries. The girls explored the warehouse looking for drawers, door hinges, knobs, glass, wood, screws, cupboard doors and other knick knacks. They were pleasantly surprised that they were able to find almost everything they needed right here in the warehouse. In the end, the little libraries were made of 90% repurposed material. During their visit, the girls were shocked to find out how many materials were saved from landfills.

Girl Scout troop 45642 were thankful that everything they had collected for their project at ReBuilding Center was donated to their project and sent us a handful of articulate and adorable thank you letters. We are thankful to them as well! Girl Scout Troop 45642 displayed what true leadership looks like by coming together as a team to accomplish what they set out to do for the betterment of their community and environment. We would like to thank the Girl Scout Troop and let everyone know that it’s volunteers and community that allow Rebuilding Center to continue to strengthen the social and environmental vitality of local communities!

Check out all the sweet letters the girls wrote us!

Done With Winter Creative Reuse Project

Window-greehouse.jpg

Winter is slowly coming to an end and it’s almost time for all the beautiful roses and ripe tomatoes to blossom and grow. In Portland, with all the excess rain it's a little harder to make sure your plants don’t get overwatered. Other times the sun just doesn't want to cooperate. You might be thinking, “well there's not much I can do to control the rain or shine”. You could purchase a greenhouse, although it might be quite a financial investment when all you want is a few vegetables and a some flowers. Why not come down to the ReBuilding Center and pick out some beautiful windows and make your very own miniature greenhouse?

All you need is screws, nails, your toolbox, and, most importantly, some used windows.

Let's get started! Here are two options, so it’s up to you to start your own mini greenhouse project that you are most comfortable with:

Option 1:

•Lay one window flat as the floor (or go without a floor so that the greenhouse can be picked up and placed over plants as needed)

Windown-GH1-429x307.jpg

•Attach two windows with a piece of angle iron in a peak for a gabled roof

•Lift one wall taller than the one opposite with a 2×4 so that you can lay another window •across them to make an angled roof

•Use nails, screws, hinges, or angle irons to attach sides together

•Opt out of a door and leave one side open


Option 2:

•Place the sides of the four walls firmly against each other in a square (again, make sure they are the same height and length)

•Hammer nails gently through the wooden frames at each corner

•Strengthen with angle irons placed on the inside corners if needed

•Place a fifth window flat across the top and attach to one side with hinges to create a lidded roof

Check out this link for the full how-to.

It all comes down to your personal style. Do some experimenting. If you’re more comfortable with tools, feel free to get creative with a frame, legs, and gabled roof. Happy gardening!

Hand-crafted Reclaimed Furniture from Urban Industrial NW

Welder/woodworker Greg Hostetter crafts one-of-a-kind reclaimed furniture out of materials he gets at the Rebuilding Center. The rich colors, warm tones and fascinating grains of reclaimed old-growth lumber characterize his pieces and inspire the artist in him.

After too many years working too many hours as a professional TIG welder, Hostetter left his demanding corporate job for self employment. He and his fiancée founded Urban Industrial NW about two years ago—he builds the furniture and she takes care of the marketing. He gets most of his wood from the Rebuilding Center, coming in at least three days a week to find wood with the rustic character he loves, complete with saw marks and blackening from old nails. “The Rebuilding Center is awesome. Everyone is so nice, the pricing is good and they do a lot for the community,” says Greg. “You never know what you’ll find”

Reclaimed wood takes a special eye, according to Greg. It may be hard to see through the dirt and muck accumulating on a board as it sits around for years, but he loves the magic of that “oh my gosh” moment when refinishing reveals the vibrant golden tones within. Not only is reclaimed wood better than newly harvested product, Greg’s glad no one’s cutting down a forest for his furniture.

Life as a craftsman is good for Greg. Instead of working 60 hours a week for a big company, he gets to spend more time with his family and express his creativity. 90 percent of his work is custom orders, and he puts the rest in his Etsy shop. View his work there and on his Facebook page and get inspired for Creative Reuse!

Tile Mosaics

Next time you’re visiting Rebuilding Center, be sure to visit the bathrooms! Mosaic artist and long-time staffer, Mayela Alvarado created the bright and colorful recycle sign in the Women's room. And Dan Borg brings our logo to life with this triple-hammer still life in the men’s room.

“I get so much pleasure in taking items that have been discarded and transforming them into lasting works of art” says Dan—and all our customers feel the same way! Check out more of Dan’s work at www.borgmosaics.com.

Mayela says that the Women's bathroom tile mosaic piece was only her second project after the mosaic class she took!

Come by our tile section to create your own reclaimed masterpiece.

Stepping Stones Garden

What can you do with a lot of scrap tiles ?

Marjorie Taylor loves to collect them. So when she stopped by the Rebuilding Center and checked out with her handful of awesome scrap tiles, she talked to our cashier Ella Rose about the stepping stones she makes with all of the tiles she collects.
Ella Rose’s interest in her crafty project encouraged her to finally complete an instruction guide.  
She hopes this instructions will be helpful and that other people might make some interesting yard art with fun tiles! 

We can now find it in our Creative Reuse Library here :
Stepping Stones instructions

As Marjorie says "I like to garden, but I don’t like to step in the dirt" :)

How to Make Stepping Stones

Hey!  Where are you going with all that tile?? 

Hey!  Where are you going with all that tile?? 

Glass, ceramic, terra cotta, terrazzo samples, metal, or other found objects will look great in concrete stepping stones and most can withstand the weather for quite some time. 

Project Difficulty: Moderate

Material Needed, to make 15 stones:

  • Concrete - 80lb Crack Resistant Quickcrete
  • Pam spray
  • Water – about a gallon
  • Tiles – prearranged in your pattern

Equipment Required:

  • Mixing bucket - 5 gallon
  • Stepping Stone forms – 10” houseplant dishes
  • Gloves
  • Paper Towels
  • Trowels

Very fun instructions thanks to Marjorie:

To make five 10” stepping stones, use about 27 “cups” of dry Quickcrete.  

Always use gloves when concrete is dry or wet and be careful to not breathe the concrete dust!

Think like a concrete truck and tip your bucket on its side when you’re adding water.

Add one “cup” of water at a time – aim for the bottom of the dry concrete - stir the mix slowly and in upward motions.  
Be careful to not add too much water. 

This recipe, for five 10” stones, calls for about 27 “cups” of concrete to 5 “cups” of water. 


Concrete ready to add to the forms.  

If the mix is too wet, add a little more dry concrete.  If it is too dry, add a little more water.  

Too wet, and your decorations might sink into the concrete more than you hoped for.  Also, your stone will take a day or so longer to cure.

Too dry, and the concrete will be harder to add decorations to.  

Spray your stepping stone forms with a light coat of Pam cooking spray (or something similar).  This will help the form release from the stone in a few days.


Add about four or five heaping scoops of concrete to each form.  
Divide as evenly as possible between your forms, but consider that thicker tiles and items will displace more concrete in the form.  
Overflow!


Smooth the pile of wet concrete – kind of like spreading peanut butter on toast.


It doesn’t have to be smooth as glass, just generally flat and even around the edges.  


You might see bubbles and little pools of water.  That’s ok.
Before you add decorations to the wet concrete, you might want to take a few minutes to rinse your mixing bucket. 
This short break allows the concrete to start setting up.  

Time to add decorations!
Start with bigger items, or those that will be in the middle.  
Set them gently on the surface of the smooth concrete.
With your gloved hand(s), press down firmly but gently.  Shake the dish a little as you’re pressing down. 

Shaking the dish makes the concrete act like quicksand and tiles will sink in a little easier.  
If you shake the dish, you’ll see a little more water rise to the surface too.  That’s ok.

More decorations…
Start by placing center items first and work your way out.  
Like the bigger items, gently press the items into the concrete and shake the dish at the same time.


Tah-dah!

Now it’s ready to dry.
You might see water pooling around some of the tiles.  That’s ok.  It will evaporate over the next few days and you’ll be able to rinse the “scum” off later.  


If the water seems really excessive, or it might overflow your form, gently use the paper towels to wick away the water

Wet stepping stones ready to dry in place for a few days.  
In a couple of days, you can wipe off fingerprints or scum left over from little pools of water. 


Dry stepping stones ready to cure!
After about four days of undisturbed drying time, remove the stones from the forms.

Cure stepping stones for about two weeks.  
Although the concrete is dry when you remove the form, the stones need about two weeks to cure and harden thoroughly before you can step on them or place them in the yard.  
Consider curing them on a tarp or garbage bag. 
Enjoy your stepping stones!

Here is an example of what how stones look in a winter yard. 
They add some colorful interest and weather nicely over time.  

Submitted by:
Marjorie Taylor, in Portland, OR

Herb Planter Box

Dave likes to use the materials that help give a sense of history to the projects that he does.
This project was for gifts and the people receiving them also appreciated that reused materials were utilized.

Project Difficulty: Difficult

Materials Needed:
Recycled 2x4’s
Heat register vent cover
Fiberglass resin and cloth
Waterproof wood glue
Sandpaper
Small vinyl bumpers (4)
Possibly wood filler and/or caulk

Equipment Required:
Table saw
Miter saw
Clamps (straight and band)
Planer

Instructions:
Use a recycled 2x4 about 8 feet long that has been confirmed to not to contain nails or other non-wood materials.

Step 1:
Choose a heating register that is what you want to use (I avoid painted ones to avoid potential lead paint).
Check the back of the register to confirm that around the outside edge there is at least an inch between the inside lip edge and the outside lip.
Make sure material 7/8 inch in thickness will fit easily in this space. This gives space for the box you are going to build.

Step 2:
Remove the damper from the register.
Cut the 2x4 in half in the 4 inch direction on either a table saw to give 2 pieces that are approximately 11/16 inch by 3-1/2 inches.
This also gives another opportunity to inspect for nails or other foreign materials. Safety first!

Step 3:
Trim about 1/8 of an inch both sides of the 3-1/2 inch boards. This should give 2 boards that are about 3-1/4 inch wide boards.
These can now be planed to about 9/16 of an inch thick (both boards the same thickness).
These are going to be glued with waterproof glue to give a board that is about 6-1/2 inch wide and this thickness you have made. These can now be sanded smooth.
Measure the length of the inner edges of the heat register and add 1/4 of an inch to these dimensions. Miter cut the boards.

Step 4:
Now it is needed to make the bottom of the box. Using the excess from the boards that were glued together earlier you will need to likely glue two of the boards together to make a board larger than the bottom of the box.
There should now be 4 pieces that will form a rectangular box. Using a band clamp these can be put together as a dry fit to make sure that the box will fit under the register to test the fit.
Adjustments can be made at this point if needed to make the box fit to the register.

Step 5:
Dry fit the box and use this to mark the bottom piece. After marking the bottom it can be trimmed to fit tightly in the bottom of the box.

Step 6:
Now the box is ready to assemble. I used 4 stacks of two quarter dollars under plastic wrap near the corners of the bottom to raise the bottom of the box and help avoid getting moisture trapped under the box.
Put the waterproof glue around the edge of the bottom piece. The edge pieces can now be added after placing an even layer of glue on the mitered edges and then held in place with the band clamp.
After the glue cures the box can be sanded and filled.
If you have left any holes from removed nails or other holes that go through the wood these need to be patched either from the outside or inside of the box.
I also ran a bead of caulk around the inside bottom of the box to seal up any gaps between the bottom and sides of the box. This step is necessary to keep fiberglass resin from the next step passing through the holes or gaps that might be in the box.

Step 7:
The inside of the box can now be fiberglassed following the package instructions. It is very important to completely seal the inside of the box with fiberglass.
After sanding I finished the box with polyurethane.
The final item added to my boxes were 4 small clear stick-on pads to help protect the surface that the box will be place upon.

Submitted by:
Dave Hanson, in Longview, WA

Bird Bath

Cory is inspired by “taking someone else’s materials and turning it into something they may never have dreamed of”.

Project Difficulty: Moderate

Materials Needed:

  • 1 glass diffuser (from a ceiling light fixture)
    Should be large and shallow, with no holes or openings
  • 1 glass ring with three holes (from a light fixture)
    Opening should be slightly smaller than diffuser
  • 3 knobs with bolts (from a cupboard)
    Check that knob hardware can thread through the glass ring’s holes
  • 3 door striker plates
  • Links of chain (from a light fixture or similar)
  • Mounting hardware (from an old chandelier)
  • Screws and various hardware to connect all the pieces

Equipment Needed:

  • Pliers to open and close chain links
  • Crescent wrench
  • Screwdriver (manual or power)

Instructions:

Step 1: Thread one knob’s bolt down through a hole in both the glass ring (with the knob facing up) and a door striker plate; the striker plate should cross under the ring and extend past the outer edge. (See photos below.) Fasten knob in place, then repeat steps for the remaining knobs and striker plates.

Step 2: Attach the chain links to each other and mounting hardware as needed, then attach the last link of each chain to a striker plate. (See photos below.)

Step 3: Affix mounting hardware to your chosen location.

Step 4: Rinse glass diffuser and fill with water, then place it on top of the glass ring. The outside edges of the diffuser will rest on the tops of the knobs.

What inspires you to do creative reuse?
“The thing that is so inspiring to me is taking someone else’s materials and turning it into something they may never have dreamed of. It’s also fun to enter TRC with an open mind and let the materials tell me what they want to do.”

Additional Comments
“Each time I build anything out of merchandise from The ReBuilding Center, it’s case by case how it’s built - all depending on what’s available at the time of construction.”

Submitted by:
Cory McGuire in Portland, OR

Creative ReUse Challenge: Hollow Core Doors

We’re excited to announce The ReBuilding Center’s Creative ReUse Challenge taking place throughout the month of November.

Flex your creative muscle to show off your project that reuses or re-purposes the common Hollow Core Door.  Build a desk, modify doors to make storage shelves, make it into an interesting art piece - the only limit is your imagination!  Drop by The ReBuilding Center to grab a hollow core door and discover what you can do!  All hollow core bi-pass and bi-fold doors are 25% off through November 30.

Here’s how it works:
1) Select and purchase a flat bi-pass or bi-fold hollow core door(s) at The ReBuilding Center for your reuse or re-purpose idea.
2) Create something new, useful, and/or interesting out of your door(s)!
3) If you’re willing to contribute to our creative reuse library, take photos of your finished project and email them to: reuse@rebuildingcenter.org . Please add a note telling us about your project—e.g., what you built, how you built it, how the creative process guided you, etc. (Note: By sending your submission, you are giving The ReBuilding Center permission to share your idea on our website, unless you specify otherwise.)
4) Each participant who submits a photo and description of their project will be rewarded with a 10% off coupon that can be used at The ReBuilding Center on a future purchase!
5) We will highlight selected hollow core door reuse/re-purpose project submissions in our Creative ReUse Library

Storm Window Savvy

We received a wonderful note this past week. Tracy took the storm window class we offered in September. After completing the three part workshop, she went on to create storm windows for her home. See what she had to say below…

I made one window in the class and recently completed 13 storm windows for my 1922 house.  I am so happy that the original windows will be saved from this project and that the energy efficiency has increased.  I also fixed an original dormer window that had rotting wood… I was able to take what I learned from the class (initially I knew almost nothing about woodworking) and build on that. The teacher was patient with my many questions. I am extremely happy with the finished product and know it will last for many years. - Tracy

Photo of the September Sash Window Repair and Screen/Storm Window Building class.


Photo of the September Sash Window Repair and Screen/Storm Window Building class.


Inspire and be inspired!

The ReUse Ideas Project is finally underway! Starting tomorrow (October 1st) you can submit a creative reuse idea to share with The ReBuilding Center community. These ideas will be complied and added to our ReUse Idea Library as well as displayed in the Community Resource Area and around The ReBuilding Center warehouse. 


The ReUse Ideas Project was born from a desire to encourage people to engage in creative reuse. Creative reuse involves discovering new purposes for salvaged materials, such as turning a door into a table or using a chair as a planter. Creative reuse is a vital component of the ethos at The ReBuilding Center, where used materials often rely on the ingenuity of design to bring them back to life.

In addition to inspiring the community to incorporate creative reuse into their lives, everyone who submits an idea will receive a 10% discount on your next ReBuilding Center purchase as well as be entered to win a $25 gift card!

We currently have an array of projects available online. Including the Salvaged Wood and Pipe Table featured up top. New ideas are being added daily so come back often. Check out today’s featured project: Elevated Pet Bowls pictured above.

What type of projects would you like to see featured on our website? What are you most excited to share?

Make a Reclaimed Lamp Terrarium

Looking for a cool way to reuse that old hanging lantern taking up space in your garage? How about create a terrarium out of it!

Materials you’ll need:
Reclaimed hanging lantern
Potting soil
Rocks
Succulent plants

Tools you’ll need:
Pliers
Screwdriver

Instructions:
Remove hardware from a glass hanging lantern. Fill with rocks, potting soil, arrange succulents. Not only do the paned panels recall the look of traditional terrariums, but the piece also includes a convenient door — originally for changing light bulbs — which is perfect for the occasional rearrangement of the plants and rocks.

Adapted from:
http://www.designspongeonline.com/2011/03/before-after-ariels-lamp-terrarium-lias-lamps.html#ixzz1GhyHxrGz

Like this re-use idea? Sign up for our monthly creative reuse idea newsletter here.

Summer 2010 Workshop Schedule

Our Classes and Workshops for 2010 are now open and available. The workshops take place in the ReFind Furniture woodshop located adjacent to The ReBuilding Center warehouse on 3625 N Mississippi Ave. Here, students have access to a variety of woodworking tools and learn valuable tool and construction skills they can apply to projects at home. Most importantly, students learn how to see new reuse possibilities in old building materials and are empowered to realize their ideas in new creative forms. Workshops are open to adults 18 and older unless otherwise noted.

The lineup this season includes: 

Introduction to Carpentry for Women
Papermaking Using Recycled Materials – Children Welcome
Intro to Carpentry for Women II
Found Object Printmaking
Introductory Woodworking
Window Repair Workshop

Click here to see full class descriptions and find out how you can register today.

Upcoming Class: Jewelry Making With Reclaimed Materials

Learn how to turn your found objects into new and inspiring jewelry. This three day workshop is an introduction to jewelry making using fundamental techniques to creatively integrate reclaimed materials into your jewelry designs. Students will practice sawing, drilling, filing, wire wrapping, and more.

Mon April 19, 6pm-8pm, Sat April 24, and Sun April 25, 11am - 5pm
Tuition: $90
Instructed by Cristina Aucone

ReFind Furniture ReUse Exhibition

On June 11th, 2009 The ReBuilding Center hosted the ReUse Exhibition, a creative reuse showcase, in celebration of its 11th birthday.

The ReUse Exhibition was an opportunity for community members to showcase their reuse projects inside the ReFind Furniture showroom. The projects represented wonderful diversity, ranging from coat racks and mirrors to tables, chess sets, and chairs. They all shared in common a commitment to creativity and materials reuse by using 99% salvaged materials and low-voc finishes.

"Buttermilk Reflections" by Sharilyn Service.

"Buttermilk Reflections" by Sharilyn Service.

We would like to extend our gratitude and appreciation to all of the folks who shared their reuse projects at the event. We would also like to send a very, very big thank you to all of the wonderful portland restaurants that donated food. We dined like Kings and Queens. Thank you : Bakery Bar, Porque No?, Laughing Planet, Fire on the Mountain, Pizza A Go Go, Grand Central Bakery, and Cupcake Jones!

Click here to see photos from this event.

© All Rights Reserved | Tax ID # 93-1241474